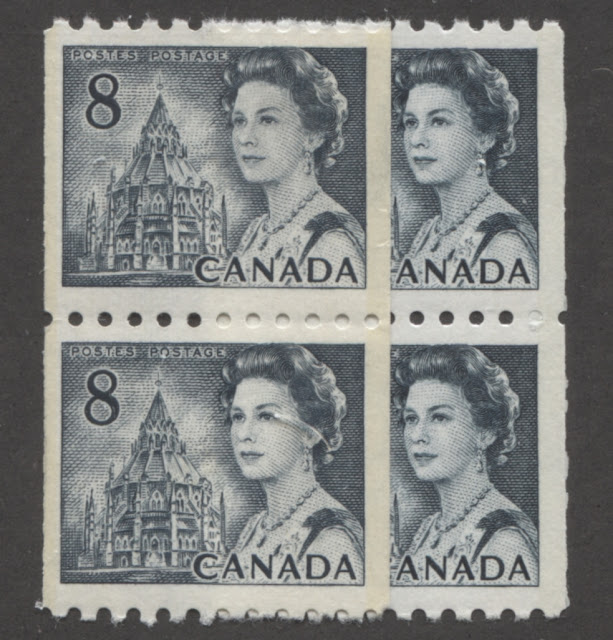
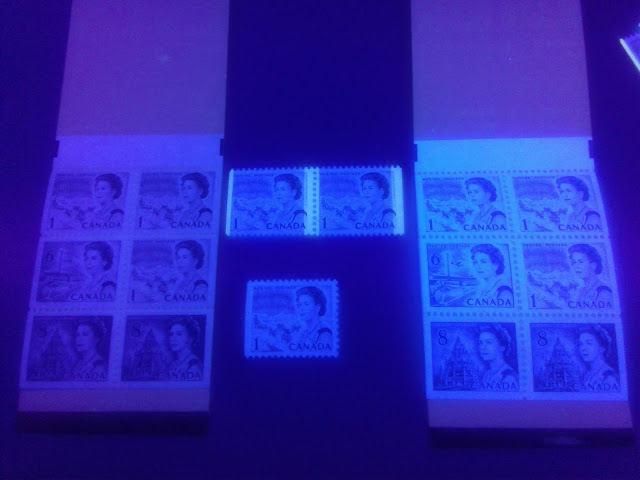
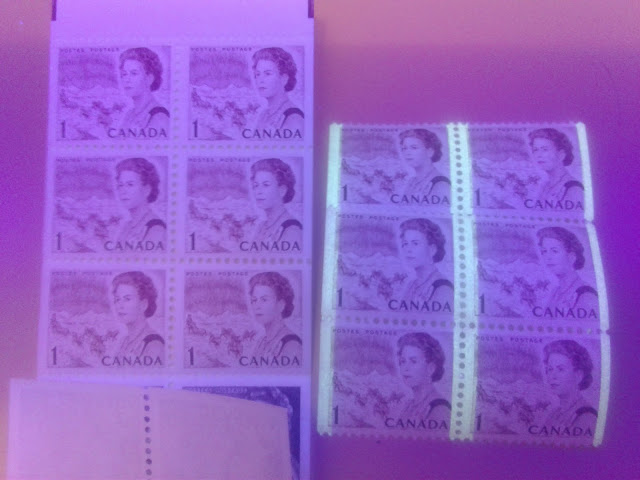
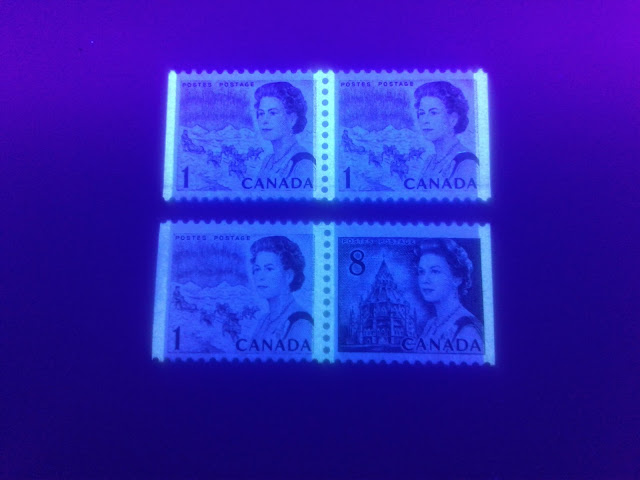
Today's post marks the last of a short series of four posts in which I deal with the last of the low value stamps of this series: the 8c Parliamentary Library stamp. Today, I will finish off the coil stamps with the tagged coils printed by the CBN and the booklet stamps which were included in 25c 50c and $1 booklets printed by the BABN. The basic content of this section is the same as that already covered for the 1c, and 6c stamps found in the same booklets, but I will adapt it with some pictures of 8c stamps and some changes to the sorting algorithm as it relates to single 8c stamps from these booklets.
The Tagged Coil Stamps - Unitrade #550p through 550pvi
Paper Characteristics Other Than Fluorescence
Apart from the fluorescence, there are other characteristics along which the paper used to print these stamps differs as follows:
Paper Fluorescence
Unitrade now lists no fewer than five levels of fluorescence for these coils:
This is the medium fluorescent paper. This paper is also a highly flecked paper whose inherent level of fluorescence is low fluorescent bluish white under UV. It contains low density concentrations of both low and medium fluorescent fibres as well as a sparse concentration of brownish woodpulp fibres that tones down the overall fluorescence a bit. The actual brightness in reality is a bit more than it appears in the picture above.
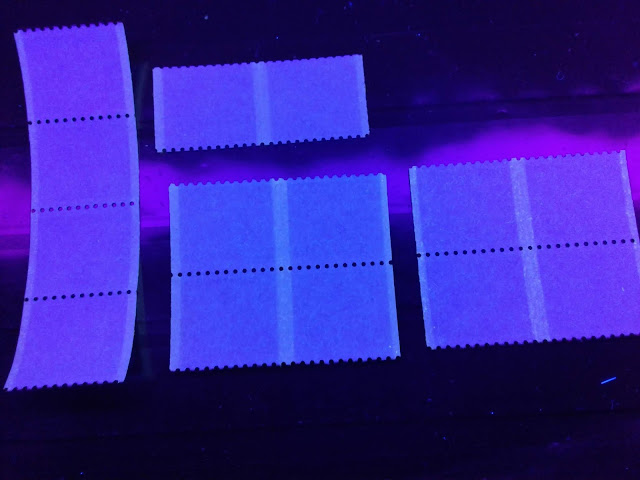
The picture above shows four different varieties of the fluorescent paper, as listed by Unitrade. This is the most common level of fluorescence found, and because of the varieties that exist with it, there is often a lot of confusion between it and the medium and low fluorescent papers. In all cases, the F paper is quite a bit brighter than the low fluorescent paper, but is not as bright as medium fluorescent. The main differences lie in the inherent level of fluorescence to the paper, the nature and concentration of embedded fluorescent fibres, and the presence or absence of brownish woodpulp fibres.
The strip on the left is on a paper that is low fluorescent greyish white and contains a low density concentration of low fluorescent fibres, and a sparse concentration of medium fluorescent fibres, as well as a very sparse concentration of brownish woodpulp fibres.
The unsevered pair at the top is on a paper that is low fluorescent greyish instead of greyish white. It contains a low density concentration of low fluorescent fibres and a sparse concentration of medium fluorescent fibres as well, but this time there are more brownish woodpulp fibres in the paper: a sparse concentration instead of a very sparse one. Yet, the overall appearance is very similar to the strip.
The unsevered block in the bottom centre is on a paper that is low fluorescent greyish white, and contains a low density concentration of low fluorescent fibres, and a sparse concentration of medium fluorescent fibres.
Finally, the unsevered block at the bottom is on a paper that is low fluorescent bluish white, and contains a low density concentration of low fluorescent fibres, and a sparse concentration of medium fluorescent fibres.
Now, let's take a look at the low fluorescent and dull fluorescent papers:
This is the true low fluorescent flecked paper. It is low fluorescent greyish white paper containing a low density concentration of low fluorescent fibres and a very sparse concentration of medium fluorescent fibres.
The next picture shows four examples of dull fluorescent paper that is so strongly flecked that it meets Unitrade's definition of low fluorescent flecked paper:
Again, the differences between these papers lie in the colour under UV as well as the brightness and concentration of the fluorescent fibres contained within them.
The two coil strips on the left are both dull fluorescent ivory grey under UV. The strip on the left contains a sparse concentration of low fluorescent fibres and a very sparse concentration of medium fluorescent fibres. The strip in the centre is similar, except that in addition to the low and medium fluorescent fibres, there are very few high fluorescent fibres as well.
The single and the pair on the right are both dull fluorescent grey under UV. The single contains a sparse concentration of low fluorescent fibres, and very sparse concentrations of both medium and high fluorescent fibres, while the pair contains a sparse concentration of low fluorescent fibres, a very sparse concentration of medium fluorescent fibres and very few high fluorescent fibres.
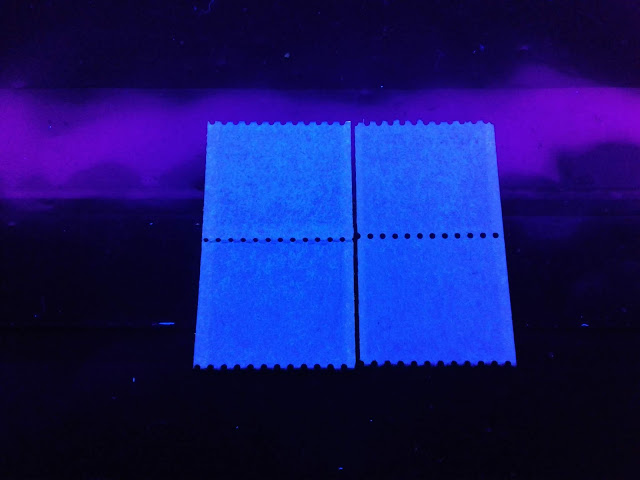
Finally, the picture below shows a low fluorescent paper that at first appears to contain no fluorescent fibres, but a fair number of brownish woodpulp flecks:
This paper is a low fluorescent bluish white and contains a sparse concentration of low fluorescent fibres and a sparse concentration of brownish woodpulp fibres. The fluorescent fibres are not readily visible because their brightness is obscured by the inherent fluorescence level of the paper.
So, as you can see, there is quite a wide variation in even the basic levels of paper fluorescence, such that sorting these into their various categories can be quite confusing unless you are familiar with what each of the overall fluorescence levels looks like, or have lots of comparison copies on hand.
This leaves us with the dull fluorescent paper. I have not yet come across any dull fluorescent paper that is completely free of fluorescent fibres. All of the papers that I have examined contain at least some. However, the three types shown below contain sufficiently few bright ones that, their presence does not raise the overall fluorescence level from dull to low:
The single on the left and the pair are both on paper that appears dull fluorescent ivory grey under UV, while the single at the top right is dull fluorescent grey. The upper left single contains a very sparse concentration of low and medium fluorescent fibres. The pair contains a very sparse concentration of low fluorescent fibres and very few medium fluorescent fibres. The single at the top right contains a sparse concentration of low fluorescent fibres and a very sparse concentration of medium fluorescent fibres.
So, in all I have identified 15 different types of paper based on fluorescence.
Shades
The shades of ink used to print these stamps are remarkably uniform. I have however, identified two shades of the slate ink:
The deep slate is shown in the pair on the left, while the more bluish slate is shown on the pair at the right.
Gum
There are two very slightly different types of PVA gum found on these coils:
Perforation
These coils are line perforated 10.0. I have not found any variation in the gauge of the perforation, but I would note that Unitrade does list two varieties of imperforate pair: one whose fluorescence is unspecified, and the high fluorescent paper. It is not clear whether the unspecified type encompasses all the other levels of fluorescence, or whether it is meant to represent the more common fluorescent paper. My suspicion is that it represents all other levels of fluorescence, but one would have to acquire and study them all, which is very expensive, given that they list for between $1,400 and $1,600 in Unitrade.
Tagging
Unitrade only lists GT-2 OP-2 tagging on these coils. While it is indeed correct that all tagged coils from this issue are OP-2, there are actually two very distinctly different kinds of OP-2 tagging that were used:
Plate Flaws
There are no listed plate flaws on these stamps.
Spacing Varieties, Jumps and Unsevered Blocks
The usual jump strips and narrow , as well as wide spacing varieties can be found on these coils. I do not have any jump strips, but I do have one jump pair. The jumps on the 7c and 8c values of this series are much less noticeable than they are on the other values, but you can best spot them by trying to line up a straight edge along the framelines of two stamps. If your straight edge lies at an angle or cannot line up both framelines, then you are dealing with a jump.
The picture below shows a narrow spacing strip, with the normal 4 mm spacing between stamps 1 and 2 and 3 and 4. However, the spacing between stamps 2 and 3 is only 3.5 mm:
Bringing it All Together
I have identified 4 different paper types, 15 levels of fluorescence, two shades, two types of gum and two different kinds of tagging. I do not believe that every variety can necessarily be found in conjunction with every other kind of variety. For example, the 3 mm tagging seems to be confined to the duller papers, or which I have found 8 different varieties of fluorescence. The 4 mm tagging seems to occur on all of the paper types. As previously discussed, I believe that each fluorescence level is associated with only one of each of the 4 paper types. The shade varieties can probably be found on all the printings. The gum varieties are likely specific to each printing. So, I believe that the number of collectible single stamps, pairs or basic strips can be summarized as follows:
Note how the tagging bars on this booklet do not extend all the way to the top of the tab on the pane. Below is an example of another printing in which the tag bar runs the full length of the pane.
The Tagged Coil Stamps - Unitrade #550p through 550pvi
Paper Characteristics Other Than Fluorescence
Apart from the fluorescence, there are other characteristics along which the paper used to print these stamps differs as follows:
- A cream coloured vertical wove paper, with an almost uncoated appearance under magnification, but which can be seen to be very lightly coated on the surface. There is no visible surface ribbing on either side. When held up to a strong light source a very fine vertical mesh pattern can be seen in the paper.
- A white vertical wove paper that is uncoated on the surface. There is no visible surface ribbing on either side and when held up to a strong light source, no visible mesh pattern can be seen.
- A slightly thinner, white vertical wove paper that has a very slight surface coating, as type 1 above. When held up to a strong light source, a clear vertical mesh pattern is visible in the paper.
- A white vertical wove paper that also bends easily in the horizontal direction. Stamps on this paper tend to curl horizontally. There is a very light surface coating when examined under magnification. When held up to a strong back light, there is no clear mesh pattern visible.
It is not clear whether or not the above types of paper are found only with a few fluorescence levels, or whether they can be found with all of the fluorescence levels discussed below. A systematic study will be required to establish with reasonable certainty which paper types exist with which levels of fluorescence.
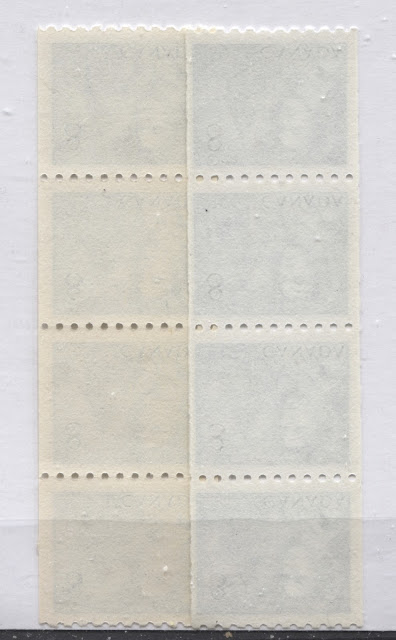
The scan below shows the difference in appearance between the cream and white papers on two coil strips as seen from the back.
The cream paper is shown on the left, while the white paper is shown on the right.
Paper Fluorescence
Unitrade now lists no fewer than five levels of fluorescence for these coils:
- Fluorescent, which is really a flecked paper whose brightness level is between low and medium fluorescent.
- High fluorescent.
- Medium fluorescent.
- Dull fluorescent.
- Low fluorescent flecked.
It should not surprise collectors to learn that there are actually several varieties of some of the five types listed above. I only have a fairly limited amount of material in my stock to work with right now, so I am sure that I probably won't have identified all the varieties that exist, but hopefully I will have identified a good cross-section of them. I will, or course add more varieties as I become aware of them.
The pictures below show the various fluorescence levels that I have found so far on these stamps:
The above picture shows two very slightly different variations of the high fluorescent paper, with the pair on the left being very slightly brighter than the pair on the right. These are both highly flecked papers containing medium density concentrations of low fluorescent and medium fluorescent fibres as well as a low density concentration of high fluorescent fibres. The underlying fluorescence of the papers without the fibres is low fluorescent. The UV colour of the paper of the left pair is low fluorescent greyish white, while the paper of the pair on the right is low fluorescent greyish. It is this difference, that accounts for the slight difference on brightness.This is the medium fluorescent paper. This paper is also a highly flecked paper whose inherent level of fluorescence is low fluorescent bluish white under UV. It contains low density concentrations of both low and medium fluorescent fibres as well as a sparse concentration of brownish woodpulp fibres that tones down the overall fluorescence a bit. The actual brightness in reality is a bit more than it appears in the picture above.
The picture above shows four different varieties of the fluorescent paper, as listed by Unitrade. This is the most common level of fluorescence found, and because of the varieties that exist with it, there is often a lot of confusion between it and the medium and low fluorescent papers. In all cases, the F paper is quite a bit brighter than the low fluorescent paper, but is not as bright as medium fluorescent. The main differences lie in the inherent level of fluorescence to the paper, the nature and concentration of embedded fluorescent fibres, and the presence or absence of brownish woodpulp fibres.
The strip on the left is on a paper that is low fluorescent greyish white and contains a low density concentration of low fluorescent fibres, and a sparse concentration of medium fluorescent fibres, as well as a very sparse concentration of brownish woodpulp fibres.
The unsevered pair at the top is on a paper that is low fluorescent greyish instead of greyish white. It contains a low density concentration of low fluorescent fibres and a sparse concentration of medium fluorescent fibres as well, but this time there are more brownish woodpulp fibres in the paper: a sparse concentration instead of a very sparse one. Yet, the overall appearance is very similar to the strip.
The unsevered block in the bottom centre is on a paper that is low fluorescent greyish white, and contains a low density concentration of low fluorescent fibres, and a sparse concentration of medium fluorescent fibres.
Finally, the unsevered block at the bottom is on a paper that is low fluorescent bluish white, and contains a low density concentration of low fluorescent fibres, and a sparse concentration of medium fluorescent fibres.
Now, let's take a look at the low fluorescent and dull fluorescent papers:
This is the true low fluorescent flecked paper. It is low fluorescent greyish white paper containing a low density concentration of low fluorescent fibres and a very sparse concentration of medium fluorescent fibres.
The next picture shows four examples of dull fluorescent paper that is so strongly flecked that it meets Unitrade's definition of low fluorescent flecked paper:
Again, the differences between these papers lie in the colour under UV as well as the brightness and concentration of the fluorescent fibres contained within them.
The two coil strips on the left are both dull fluorescent ivory grey under UV. The strip on the left contains a sparse concentration of low fluorescent fibres and a very sparse concentration of medium fluorescent fibres. The strip in the centre is similar, except that in addition to the low and medium fluorescent fibres, there are very few high fluorescent fibres as well.
The single and the pair on the right are both dull fluorescent grey under UV. The single contains a sparse concentration of low fluorescent fibres, and very sparse concentrations of both medium and high fluorescent fibres, while the pair contains a sparse concentration of low fluorescent fibres, a very sparse concentration of medium fluorescent fibres and very few high fluorescent fibres.
Finally, the picture below shows a low fluorescent paper that at first appears to contain no fluorescent fibres, but a fair number of brownish woodpulp flecks:
This paper is a low fluorescent bluish white and contains a sparse concentration of low fluorescent fibres and a sparse concentration of brownish woodpulp fibres. The fluorescent fibres are not readily visible because their brightness is obscured by the inherent fluorescence level of the paper.
So, as you can see, there is quite a wide variation in even the basic levels of paper fluorescence, such that sorting these into their various categories can be quite confusing unless you are familiar with what each of the overall fluorescence levels looks like, or have lots of comparison copies on hand.
This leaves us with the dull fluorescent paper. I have not yet come across any dull fluorescent paper that is completely free of fluorescent fibres. All of the papers that I have examined contain at least some. However, the three types shown below contain sufficiently few bright ones that, their presence does not raise the overall fluorescence level from dull to low:
The single on the left and the pair are both on paper that appears dull fluorescent ivory grey under UV, while the single at the top right is dull fluorescent grey. The upper left single contains a very sparse concentration of low and medium fluorescent fibres. The pair contains a very sparse concentration of low fluorescent fibres and very few medium fluorescent fibres. The single at the top right contains a sparse concentration of low fluorescent fibres and a very sparse concentration of medium fluorescent fibres.
So, in all I have identified 15 different types of paper based on fluorescence.
Shades
The shades of ink used to print these stamps are remarkably uniform. I have however, identified two shades of the slate ink:
- A deep bluish slate, and
- A deep slate that lacks the clear bluish undertone.
The scan below shows the difference between these two shades quite clearly:
The deep slate is shown in the pair on the left, while the more bluish slate is shown on the pair at the right.
Gum
There are two very slightly different types of PVA gum found on these coils:
- A dull PVA that is white and has an eggshell sheen. When tilted at an angle to a strong light source, this type of gum reflects almost no light.
- A very slightly creamy PVA gum with a satin sheen. When tilted at an angle to the light, stamps with this gum do reflect some light and there is some glare.
The difference between these is quite slight, until you know what to look for, and after you see it, it is quite distinct. I have attempted to capture the difference between the two types in the picture below:
The satin gum is shown on the left single, while the flat gum is shown on the strip at right.
Perforation
These coils are line perforated 10.0. I have not found any variation in the gauge of the perforation, but I would note that Unitrade does list two varieties of imperforate pair: one whose fluorescence is unspecified, and the high fluorescent paper. It is not clear whether the unspecified type encompasses all the other levels of fluorescence, or whether it is meant to represent the more common fluorescent paper. My suspicion is that it represents all other levels of fluorescence, but one would have to acquire and study them all, which is very expensive, given that they list for between $1,400 and $1,600 in Unitrade.
Tagging
Unitrade only lists GT-2 OP-2 tagging on these coils. While it is indeed correct that all tagged coils from this issue are OP-2, there are actually two very distinctly different kinds of OP-2 tagging that were used:
- The first tagging is 3 mm wide and glows a bright green colour under UV light.
- The later tagging is 4 mm wide and glows a bright greenish yellow under UV light. The brighter the fluorescence of the paper on which the stamp is printed, the brighter the yellow.
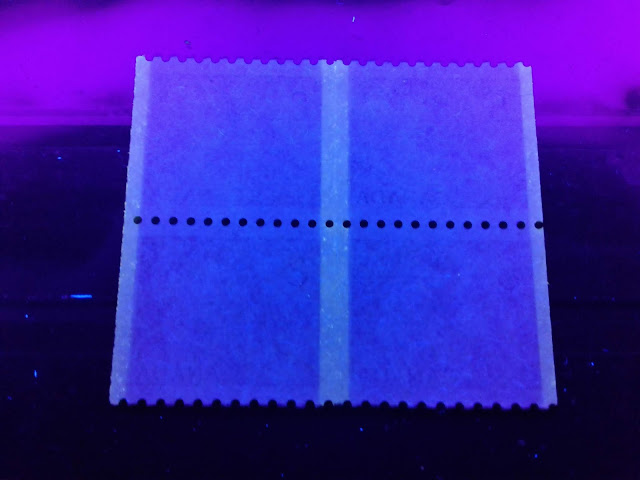
The tagging was applied by roller along the sheet between the stamps, before assembly into rolls. However, the application of the taggant was not always continuous, with very small breaks being visible on some coil pairs and strips. On others, you can see evidence of overlapping where one tagging application ended and the other began also. My camera is not good enough to show this variety here, but the picture below shows very nicely, the difference in size between the 3 mm and 4 mm tagging as well as the difference in colour. There is even a clear horizontal break in the tagging on the lower strip with the 3 mm tagging:
As you can see in the picture above, the easiest way to tell the difference between the 3 mm and 4 mm tagging is by the difference in spacing between the tagging bars. On the 4 mm tagged coils, there is a 20 mm horizontal space between the inside edges of the tag bars. On the 3 mm tagging. this space is 19 mm. Using the width of the tagging bars on single strips and pairs is not a reliable way to distinguish the tagging because the width of the bars can be influenced by the centering or the width of the margins. The spacing between the tag bars is a far more reliable way to distinguish between the two types. You can see the break in the tagging in the middle of the right and left margins of the second stamp.
Plate Flaws
There are no listed plate flaws on these stamps.
Spacing Varieties, Jumps and Unsevered Blocks
The usual jump strips and narrow , as well as wide spacing varieties can be found on these coils. I do not have any jump strips, but I do have one jump pair. The jumps on the 7c and 8c values of this series are much less noticeable than they are on the other values, but you can best spot them by trying to line up a straight edge along the framelines of two stamps. If your straight edge lies at an angle or cannot line up both framelines, then you are dealing with a jump.
The picture below shows a narrow spacing strip, with the normal 4 mm spacing between stamps 1 and 2 and 3 and 4. However, the spacing between stamps 2 and 3 is only 3.5 mm:
In addition to narrow spacing varieties, wide spacing varieties in which the spacing is 4.5 mm or 5.0 mm exist as well, although I do not have an example to show at the moment.
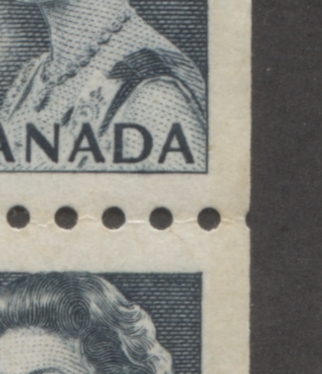
The scans below shows a jump pair, with a close up of the very slight jump to the right, of the top stamp in the pair:
Here, you can see, if you look carefully, that the right margin of the top stamp is very slightly narrower than the same margin on the bottom stamp. The top stamp is shifted slightly to the right, relative to the bottom stamp.
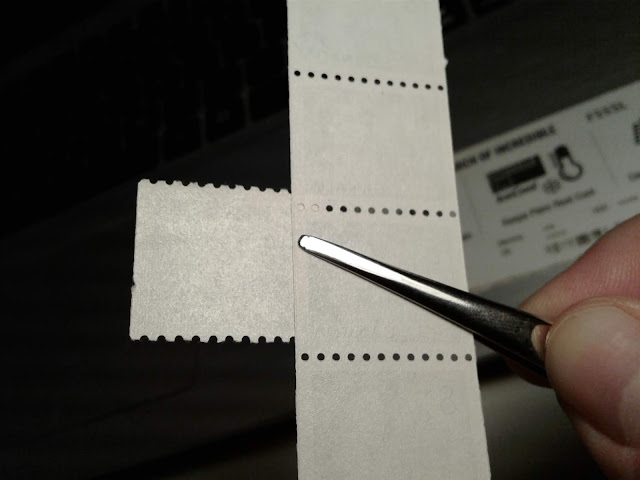
Like the other coils that were issued in se-tenant rolls of 100, being both 6c values and the 7c, these coils can also be found in unsevered blocks from having unraveled two rolls that had not been snapped apart at the score line. Generally, these blocks will show a strong to at least some trace of the score line between the stamps, and as such are not true partial imperforate varieties. They are, however, an interesting novelty and look quite striking on an album page. An example of such a block is shown below:
Bringing it All Together
I have identified 4 different paper types, 15 levels of fluorescence, two shades, two types of gum and two different kinds of tagging. I do not believe that every variety can necessarily be found in conjunction with every other kind of variety. For example, the 3 mm tagging seems to be confined to the duller papers, or which I have found 8 different varieties of fluorescence. The 4 mm tagging seems to occur on all of the paper types. As previously discussed, I believe that each fluorescence level is associated with only one of each of the 4 paper types. The shade varieties can probably be found on all the printings. The gum varieties are likely specific to each printing. So, I believe that the number of collectible single stamps, pairs or basic strips can be summarized as follows:
- 3 mm OP-2: 8 x 2 = 16 varieties possibly.
- 4 mm OP-2: 15 x 2 = 30 possible varieties.
Now, each of these strips can be collected as a wide spacing strip, a narrow spacing strip, a jump strip, or an unsevered block. This quadruples the number of collectible varieties, resulting in up to 64 possible strips or unsevered blocks for the 3 mm OP-2 and 120 possible strips of the 4 mm OP-2.
Now, let's look at the booklet stamps:
Stamps Perforated 12.5 x 12, From 25c Booklets - Unitrade #544x, xii-xvii, #544pxi,pxiii-pxviii
Paper Characteristics Other Than Fluorescence - Non Themed Cover Booklets BK69a-y
The paper used for these stamps has a slightly whiter appearance on the front, when viewed against a black background. McCann lists two sub-types of this paper:
- A vertical ribbed paper in which the ribbing is only faintly visible on the paper surface, but becomes very pronounced, when the stamps are viewed against strong back-lighting. This is a vertical wove paper, and it has a very smooth, uncoated surface. Occasionally, little minute depressions are visible in the paper's surface.
- A vertical wove paper that does not show any ribbing at all, even when viewed against strong backlighting. This paper appears almost as smooth under magnification, as the first paper above, but loose fibres are visible on the paper surface, under magnification.
Paper Fluorescence - Non Themed Cover Booklets
According to Unitrade, the paper used on these booklets exists in five grades of fluorescence, while according to McCann, the number of grades of fluorescence that are reported to exist, depends on whether or not the paper is the ribbed paper or not:
- Ribbed paper is reported to exist in low, medium and high fluorescent grades.
- Smooth (non-ribbed) paper is reported to exist in low, medium, high fluorescent and hibrite grades.
According to McCann, none of these booklets exist with dull fluorescent paper. Thus it is logical to conclude that Unitrade's dull fluorescent listings for these booklet stamps, must have come from the later printings with the 10 cover designs in brown.
The picture below shows the low fluorescent, high fluorescent and hibrite papers, as listed by McCann:
The lighting conditions in which this picture was taken make everything look a little duller than it is. For instance, the low fluorescent paper in this picture appears dull, but is actually low fluorescent.
- The low fluorescent paper appears a greyish white colour on the front, and a bluish white colour on the back under UV light. There are a few brownish woodpulp fibres visible here and there on the paper, but not many. There is what can best be described as a low density concentration of low fluorescent fibres, and a sparse concentration of medium fluorescent fibres visible in the paper.
- The medium fluorescent paper is a greyish colour under UV, but has a medium density concentration of medium fluorescent fibres that give it a medium fluorescent appearance.
- The high fluorescent paper is a greyish white colour under UV, but has a medium density concentration of low and medium fluorescent fibres, which makes it appear as high fluorescent. There are no brownish woodpulp fibres visible in this paper.
- The hibrite paper is a medium fluorescent bluish white colour under UV, but there is a high density concentration of medium and high fluorescent fibres that make the paper appear hibrite overall.
Tagging - Non-Themed Cover Booklets
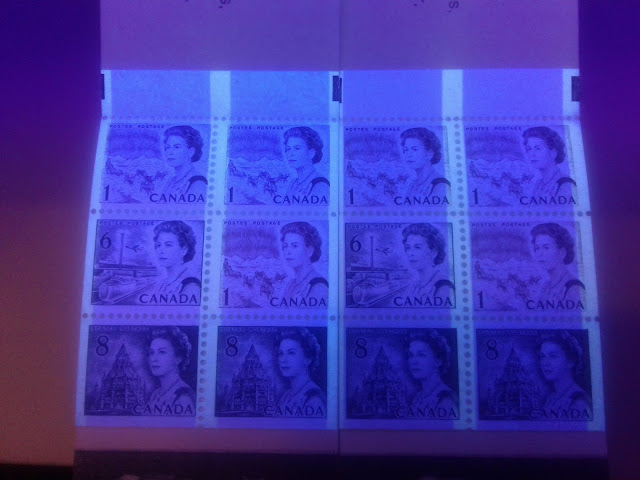
According to McCann, there were some printings that were made with 4 mm OP-4 tagging that gave a light green glow under UV, as shown in the picture above. He lists the tagged stamps as existing on three types of paper:
- Smooth, medium fluorescent.
- Smooth, high fluorescent.
- Ribbed, high fluorescent.
Paper Characteristics Other Than Fluorescence - Themed Cover Booklets - BK69aa-as
There were two basic types of paper used to produce these booklets:
- A horizontal wove paper that shows no ribbing on the surface and in fact is smooth, and under magnification appears to have a very light surface coating.
- A horizontal wove paper that shows clear vertical ribbing on the face, that is not visible in back-lighting, but can be easily seen under magnification, and to a lesser extent, by viewing stamps at an angle to the light. The ribbed paper appears to also have a very light surface coating.
McCann makes no specific mention of this difference on these booklets, but only those with the plain covers, issued earlier. Neither does Unitrade. Unitrade only acknowledges ribbed paper on BK71, but it very clearly exists on these booklets. What is not clear from the study I have done, is what the full range of tagging and fluorescence varieties is on this paper type. I have found dull paper, with no tagging and high fluorescent paper with OP-2 tagging, which I will illustrate and describe. But so far, that is all I have found in looking through over 100 booklets. However, that is a very small sample, and there may well be, and probably are, more varieties.
Paper Fluorescence - Themed Cover Booklets
Paper Fluorescence - Themed Cover Booklets
According to Unitrade and McCann, the untagged stamps exist with all the major grades of fluorescence:
The various pictures below show some of these varieties, which I will attempt to describe, as the same overall fluorescence level can show differences in terms of the overall colour under UV, as well as the concentration and brightness of fluorescent fibres contained within the paper, as well as brownish woodpulp flecks.
We will begin with the medium and high fluorescent papers on the OP-4 tagged booklets:
- Dull fluorescent
- Low fluorescent
- Medium fluorescent
- High fluorescent
- Hibrite
According to Unitrade and McCann, the OP-4 tagged stamps exist only with low, medium and high fluorescence, while the OP-2 stamps exist with five grades of fluorescence:
- Dead (non-fluorescent)
- Dull fluorescent
- Low fluorescent - Unitrade does not list this, but McCann does.
- Medium fluorescent
- High fluorescent
These discrepancies are useful in assisting collectors in the task of distinguishing the different levels of fluorescence. For example, neither of the tagged stamps are reported to exist with the hibrite paper, which suggests that if you come across panes that are tagged, that appear to be hibrite, chances are they are high fluorescent, rather than hibrite. Likewise the dead paper is only reported to exist on the OP-2 tagged panes, so that panes that untagged panes on apparently dead paper, are probably just dull. Starting your study with the OP-4 tagged panes is useful because they do not include the fluorescence levels at the extreme ends of the scale, i.e. no dull, no dead and no hibrite. So if you have enough of them to sort, you can get a good feel for the differences between low, medium and high fluorescent papers.
Because neither McCann, nor Unitrade differentiate between smooth and ribbed papers, it is not clear whether some of these levels of fluorescence exist only with one type of paper and not the other, or whether they exist with both.
The various pictures below show some of these varieties, which I will attempt to describe, as the same overall fluorescence level can show differences in terms of the overall colour under UV, as well as the concentration and brightness of fluorescent fibres contained within the paper, as well as brownish woodpulp flecks.
We will begin with the medium and high fluorescent papers on the OP-4 tagged booklets:
The high fluorescent paper is on the left. It is basically a medium fluorescent bluish white paper under UV that contains a low density concentration of high florescent fibres, which give the paper an overall high fluorescent appearance. On the back, the paper appears bright white, and under magnification you can see a medium to high density mass of fluorescent fibres that do not stand out, which suggests that on the back the paper is high fluorescent, and the fibres are high fluorescent.
The medium fluorescent paper is shown on the right. It is a dull fluorescent greyish paper under UV that contains a low density concentration of low fluorescent fibres and a sparse concentration of medium fluorescent fibres, that give it an overall appearance of being medium fluorescent. If we look at the back of the pane, we see that the paper is also dull fluorescent greyish, with a medium density concentration of low fluorescent fibres and a low density concentration of medium fluorescent fibres. These give the paper a medium fluorescent bluish white appearance overall, as seen from the back. I don't think there is really any difference in fluorescence levels on the front and back, but the true fluorescence shows more clearly on the back, without the printed design to distract our eyes.
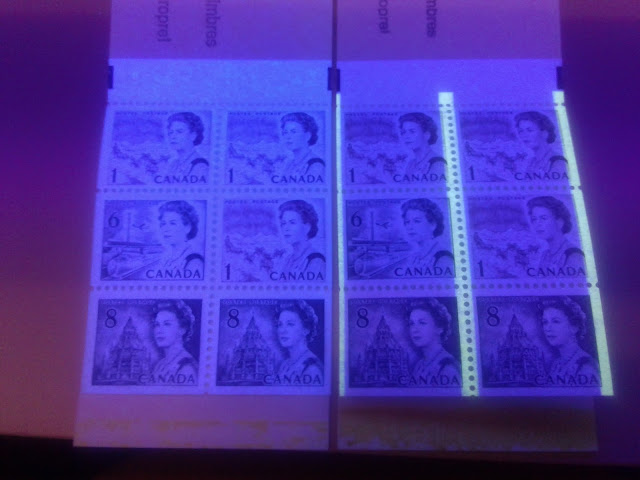
Next, we have an untagged pane on smooth, high fluorescent paper and an OP-2 tagged pane on smooth medium fluorescent paper:
The booklet on the right is an example of the OP-2 tagging on medium fluorescent paper, while the untagged pane on the left is on high fluorescent paper:
- The high fluorescent paper is actually a dull fluorescent greyish paper that contains a medium density concentration of low, medium and high fluorescent fibres. Together, these give it the appearance of being HF. On the back, the paper is dull fluorescent greyish, with a low density concentration, of low, medium and high fluorescent fibres that give the paper an overall HF appearance. This paper is clearly different from that used on the OP-4 booklets in that the colour under UV is bluish white rather than white, and the fluorescent fibres show up much more clearly because the ambient level of fluorescence in the paper is only dull.
- The medium fluorescent paper is a dull fluorescent greyish paper containing a low density concentration of low fluorescent fibres, a sparse concentration of medium fluorescent fibres, and a sparse concentration of brownish woodpulp fibres. Together, these give the paper an overall MF appearance. On the back, the paper is dull fluorescent greyish with a low density concentration of low fluorescent fibres and a sparse concentration of medium fluorescent fibres, that give it an overall MF appearance. Again, this paper is slightly different from that used to produce the OP-4 tagged booklets on MF paper, in that the concentrations of low fluorescent fibres and medium fluorescent fibres are lower, which gives it a bluish appearance under UV, rather than a bluish white appearance.
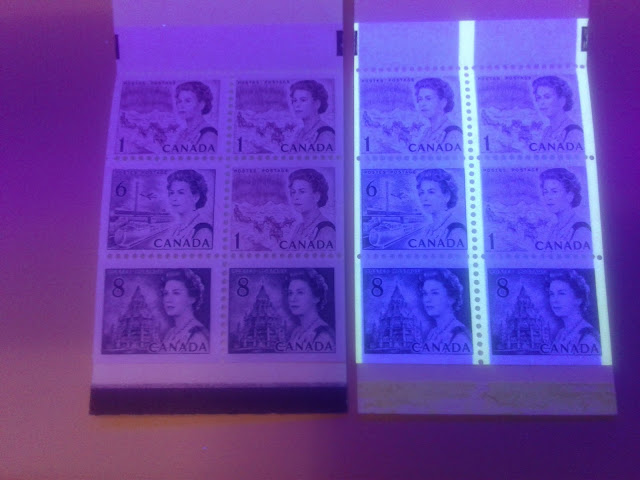
Now lets take a look at two of the ribbed papers: one on dull paper, and the other on medium fluorescent paper with OP-2 tagging:
The dull paper is shown on the left. The type shown here is actually a non-fluorescent violet paper under UV that contains a low density concentration of low fluorescent fibres, which raises the fluorescence level overall from dead to dull. It appears exactly the same on the back and the front.
The medium fluorescent paper used on this printing is different again slightly from the other medium fluorescent papers shown so far. On the back, it is still bluish, but clearly brighter than the other OP-2 booklet with the short tagging bars, but not quite as bright as the OP-4 booklet, which suggests to me that the ambient level of fluorescence is a little higher, like say a dull fluorescent greyish white, rather than a grey. There appears to be a medium density concentration of low fluorescent fibres, and a low density concentration of medium fluorescent fibres, visible in the paper. So there is a higher concentration of fibres in this paper than the OP-2 paper. But overall, it is still medium fluorescent.
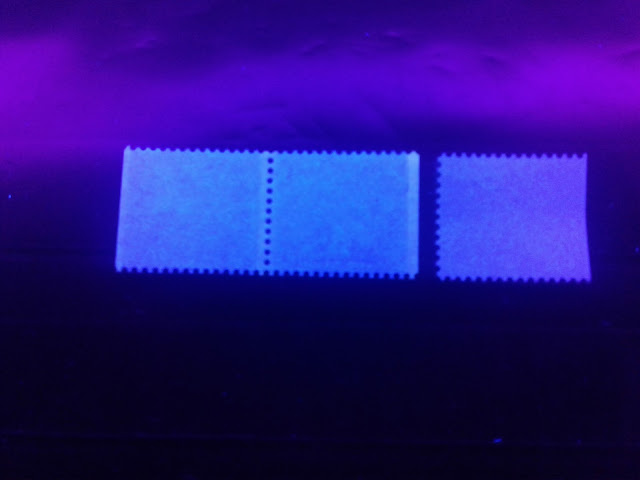
This leaves low fluorescent paper, and hibrite paper, which I haven't shown yet. Unfortunately I do not have a hibrite example to show here, but will add one when I come across it. Fortunately I do have two very slightly different low fluorescent papers: one smooth, with OP-2 tagging, and the other ribbed without tagging. The pictures below show both types. Please note that although the picture shows 1c stamps, the 8c stamps taken from the same booklet will look identical, in terms of their fluorescence. :
Clearly the tagged pair looks a little brighter than the right stamp, but it is not bright enough to be medium fluorescent. The overall appearance of the tagged pair on the front is bluish, but under magnification you can see you can see that the paper is a dull fluorescent deep grey, with, what seems to be a sparse concentration of medium fluorescent fibres that are raising the overall perceived fluorescence level from dull to low. The stamp on the right appears dull fluorescent grey under UV, with a sparse concentration of both medium fluorescent fibres and brownish woodpulp specks, that overall, raise the perceived fluorescence from dull to low.
Let's take a look at the backs:
On the tagged pair, the paper appears bluish white overall. Under magnification, it is clear that the ambient fluorescence level is dull fluorescent greyish white. There is a low density concentration of low fluorescent fibres, and a sparse concentration of medium fluorescent fibres, as well as a very few brownish woodpulp fibres that give it a MF appearance on the back only.
The stamp on the right is dull fluorescent deep greyish under UV, with a low density concentration of low fluorescent fibres, a sparse concentration of medium fluorescent fibres and a sparse concentration of brownish woodpulp flecks. Overall this gives a low fluorescent greyish appearance.
So far, all of the booklets from this group that I have looked at do not show significant levels of brownish woodpulp fibre in the paper. The woodpulp fibres are something that we typically see in stamps issued between 1972 and about 1974. As we shall see, BK71 is printed on paper that usually shows the same level of woodpulp fibres as the stamp shown above does. So it is possible that it comes from BK71 rather than BK69. However, BK69 would have been issued until the 25c Caricature booklet replaced it in April 1974. So what seems much more likely to me is that the initial printings of these booklets were on smooth paper, and then the last printings, made between 1972 and 1974 were on the ribbed paper. This seems consistent with my observation that there are no OP-4 tagged booklets with ribbed paper, as OP-4 tagging had been replaced by OP-2 at this point. Most all of the fluorescence levels found in the period from 1971 to 1972 are also found up until 1974, so I would think that the ribbed papers and smooth papers would exist with the same levels of fluorescence.
Tagging - Themed Cover Booklets
There were three two types of tagging found on these booklets:
- A pale green OP-4 tagging that was 4 mm wide, as shown above, and
- A bright greenish yellow OP-2 tagging that was 3 mm wide and shown below
Note how the tagging bars on this booklet do not extend all the way to the top of the tab on the pane. Below is an example of another printing in which the tag bar runs the full length of the pane.
Distinguishing the tagging can be difficult for some collectors because the OP-4 tagging on these booklets does not show the same fading and migration that OP-4 tagging on the 1972-78 Caricature issue shows. However, it does migrate onto the booklet covers, and if you examine the covers of complete booklets, you can usually see some evidence of migration from the panes. In any event, the OP-4 tagging is generally always a pale green under UV and is 4 mm wide, whereas the OP-2 has more of a bright yellow appearance, and is always 3 mm wide.
Paper Characteristics Other Than Fluorescence - $1 Booklet BK70

Paper Characteristics Other Than Fluorescence - $1 Booklet BK70
The paper used for these booklets is a horizontal wove that shows clear vertical ribbing when viewed against strong back-lighting. Under magnification, there appears to be a very light coating on the paper surface that gives it a satin sheen, and the ribbing is very faintly visible. The paper appears noticeably creamy when viewed against a white background:

You can clearly see that the paper is off-white, though it is not as creamy as the paper from BK66 and BK68 for instance. Although the picture shows the 1c stamp, the paper of the 8c stamp, which comes from the same booklet will be identical.
Paper Fluorescence - $1 Booklet - BK70
The paper used to print these booklets is a dull fluorescent paper, that contains no visible fluorescent fibres, nor any brownish woodpulp flecks. Under UV it appears a greyish colour.
Tagging - $1 Booklet - BK70
Some of the booklets issued had 4 mm OP-4 tagging that glowed light green as shown in the picture above.
Paper Characteristics Other Than Fluorescence - 50c Booklets - BK71
The paper used to print these booklets is a vertical wove paper that is very strongly ribbed, with the vertical ribbing being very obvious when the stamps are examined under magnification, viewed at an angle to the light, or viewed against strong back-lighting. The printed surface of the paper appears very smooth under 10x magnification, but uncoated and somewhat porous. Paper Fluorescence - 50c Booklets - BK71
Both Unitrade and McCann list two grades of fluorescence: low and medium. However, there are actually at least four types of paper, which are close variations of the two basic varieties. Before I get into those, I will illustrate the two basic types of paper fluorescence in the picture below:
The medium fluorescent paper is shown on the left, and the low fluorescent paper on the right. Again, the lighting conditions make both papers appear less bright than they actually are.
Both papers contain brownish woodpulp fibres, as well as fluorescent fibres. So the variations of paper that exist, in addition to the basic two shown above, are those in which the concentration and brightness of these additional elements varies as follows:
- One paper is dull fluorescent greyish under UV, with a low density concentration of low fluorescent fibres, a sparse concentration of medium fluorescent fibres, a very sparse concentration of high fluorescent fibres and a sparse concentration of brownish woodpulp fibres. Together, these give the overall appearance of medium fluorescent paper.
- One paper is dull fluorescent greyish white under UV, with a low density concentration of low fluorescent fibres, a sparse concentration of medium fluorescent fibres, very few high fluorescent fibres and a sparse concentration of brownish woodpulp fibres. Together, these give the overall appearance of medium fluorescent paper.
- One paper is dull fluorescent deep grey under UV, with a low density concentration of low fluorescent fibres, a very sparse concentration of medium fluorescent fibres, and a sparse concentration of brownish woodpulp fibres. Together, these give the overall appearance of low fluorescent paper.
- One paper is dull fluorescent greyish under UV, with a sparse concentration of low fluorescent fibres, a very sparse concentration of medium fluorescent fibres, and a sparse concentration of brownish woodpulp fibres. Together, these give the overall appearance of low fluorescent paper.
Tagging - 50c Booklets - BK71
Some of the booklets printed exist with OP-4 Ottawa tagging as shown above. However, instead of the bands being 4 mm wide as before, the bands are always 3 mm wide. The picture above shows both types of paper, with the medium fluorescent paper on the top, and the low fluorescent paper on the bottom. Note how much brighter and yellowish the tagging of the top pair appears, as compared to the pale green tagging of the bottom pair. Again, the top pair are not the 8c stamps, but it should be noted that the 8c stamps will exhibit the same paper fluorescence and tagging as the above pairs.
Shades
I have not noted any significant variation in the shades of the slate used to print these stamps. All the stamps that I looked at are printed in the same shade of deep bluish slate.
Gum - 25c Booklets - BK69's
The gum used on the printings from the first, non-themed cover booklets was a whiter PVA, with a satin sheen. Later, with the themed cover booklets, the gum takes on a slightly creamier, but still very white appearance.
Gum - $1 Booklets - BK70
The gum used for these booklets is very distinct. It is a thick PVA that had a semi-gloss sheen, almost appearing to be a cross between dextrose gum and PVA. The thickness of this gum usually causes stamps with it to curl horizontally.
Gum - 50c Booklets - BK71
The gum found on these stamps is a white PVA with a satin sheen.
Perforation
Unitrade lists the perforation as comb 12.5 x 12. However, McCann notes that the exact gauge is 12.4 x 11.9.
Plate Flaws
The only listed constant plate flaw that is found on this stamp is the short print that occurs on one 8c stamp from the $1 booklet. it is the second stamp in the 4th row. On this stamp a portion of the bottom of the design is seen to be missing. It is a very scarce variety that only occurs on a handful of booklets, and catalogues $200 for a mint single in McCann. In addition, McCann does note that a number of non-constant flaws, scratches and inking flaws can be found on any of the 25c, 50c and $1 booklets that were issued between 1971 and 1972. I have not come across any of note among my stock. However, I will be sure to add images of any that I come across in due course.
Conclusions: Sorting Single Booklet Stamps
As we have seen, despite the apparent similarities of the booklet stamps, there are characteristics of each booklet that allow us to assign individual stamps to a particular booklet.
If you have pairs of stamps from a booklet, it may possible to assign those to a particular booklet right away, based on the layout of the stamps, which are specific to a particular type of booklet:
- A vertical pair of the 1c and 8c stamps in which the right and bottom edges are straight must come from a 25c booklet.
- A vertical pair with a straight edge only at left and no straight edge at bottom must come from a $1 booklet.
- A vertical pair of the 1c and 8c with straight edge at right can come from either the 50c booklet or the $1 booklet. The final determination will depend on the gum, paper fluorescence and whether or not the paper is ribbed.
- A horizontal pair of the 1c and 8c can only come from the 50c booklets.
- A horizontal pair of the 8c with no straight edge at bottom can come from either the 50c booklet or the $1 booklet. The final determination will depend on the gum, paper fluorescence and whether or not the paper is ribbed.
In terms of sorting singles, the gum is the best attribute to start with, if you are sorting mint stamps:
- If the the gum is white PVA it comes from either BK69 (25c booklet) or BK71 (50c booklet).
- If the gum is the thick shiny PVA with the cream colour that causes the stamps to curl horizontally, then it is from BK70 ($1 booklet).
So, after doing this sort, the task that remains is to sort the BK69 from BK71 singles. The next best characteristic to do this in my opinion is to look for brownish woodpulp fibres under UV light and to look for ribbed paper. So I would sort any remaining stamps into two piles:
- Those on smooth paper, with no ribbing: these must come from BK69. It may not be clear whether they come from the earlier 1971 booklets with the plain covers or the later booklets, but they do come from one of the 25c booklets. The next task will be to sort those further.
- Those on ribbed paper: these will come either from BK69 or BK71.
Then, I would take the ribbed papers and sort them further by looking for those papers that are either low fluorescent, or medium fluorescent and which contain at least a sparse concentration of brownish woodpulp fibres, as these are from BK71. That leaves the rest of those stamps as being from BK69.
Then, with the remaining BK69 stamps on the smooth and ribbed papers, look now for tagged stamps with 3 mm OP-2 tagging. Those must come from the later 1972-74 BK69's. That leaves you with OP-4 tagged stamps, which can come from either the 1971 or 1972-74 booklets, and untagged stamps.
The next thing to look for is tricky and requires experience, and that is the appearance of the paper under magnification. You are looking for paper that appears to have no surface coating, and where you can see small loose fibres on the paper surface, or minute depressions in the paper, as these will come from the earlier BK69's. All the later BK69 stamps lack the depressions in the paper and they all have a very light surface coating, which prevents any loose fibres from appearing on the paper surface. The ribbing of the earlier paper is also much more pronounced when viewed against back-lighting that the later booklets, where you can barely see it against back-lighting. Applying this test correctly will allow you differentiate singles from BK69a-y (McCann) or BK69a-c (Unitrade) from all the others (BK69aa-as in McCann and BK69d-k in Unitrade). You can then go about sorting the different levels of paper fluorescence.
If your stamps are used, the sorting is more difficult, but is still doable. But you have to start with the paper first because you cannot use gum. First, sort the papers into cream paper and white paper (very light cream). Cream papers will be from BK70. White papers will come from either BK69 or BK71.
Taking the cream papers, sort them into horizontal and vertical wove paper depending on which direction the paper bends most easily, without creasing. Horizontal wove will come from BK70.
Taking the white papers, sort them into vertical and horizontal wove papers. The vertical wove papers can come from either the early BK69's or the BK71. Look in this group for non-ribbed, smooth paper. Those stamps must come from the early BK69's. This leaves you with the ribbed papers, which can be early BK69, or BK71. To sort these, look under UV light for brownish woodpulp fibres. If the paper is either low fluorescent or medium fluorescent with obvious woodpulp fibres, it is from BK71. You can then conclude that the remaining stamps on vertical wove paper are early BK69's and can then sort the different paper fluorescences and tagging, etc.
This leaves you with the white papers that are horizontal wove. All of those should come from the late BK69's from 1972-74. There will be a mixture of ribbed and smooth papers, tagged and untagged, as well as different fluorescence levels, which you can then sort, accordingly.
This takes us to the end of the 8c Parliamentary library transportation stamp. Next week, I will begin the last series of 9 posts, which will explore the printings of the high value stamps in the series, which depict printings by the Group of Seven.
This takes us to the end of the 8c Parliamentary library transportation stamp. Next week, I will begin the last series of 9 posts, which will explore the printings of the high value stamps in the series, which depict printings by the Group of Seven.
