
Today, I finish off my examination of the 15c Bylot Island stamp from the series, with an exploration of the printings made using PVA gum. Unfortunately I do not have some of the scarcer paper varieties on hand, so my descriptions will be less than complete, and I will have to add examples as they become available.
Unitrade lists four varieties of the untagged stamps, three of which are very scarce, and does not list any plastic flow varieties, even though they clearly do exist on the untagged PVA gum printings, as well as on the dextrine gum printings. I have started to use the term dextrine rather than dextrose after David Gronbeck-Jones, the famous Centennial issue specialist and author pointed out to me that dextrose is the sugar from which the dextrine gum is made. The tagged stamps are listed by Unitrade as existing with both Winnipeg tagging and General Ottawa tagging, on both dull and low fluorescent papers, for a total of 4 basic varieties. All of these exist, of course with plastic flow varieties.
According to Unitrade, the general tagged stamps were the first to appear, in February 1972, followed by the Winnipeg tagged stamps in March. All of the untagged stamps are given as being issued in 1972, but no exact date has been given for their issuance. In the absence of compelling evidence to the contrary, I would assume that they should have been issued at the same time as the tagged stamps on comparable paper.
The remainder of this post will examine the differences in paper, shade, perforation and gum that can be found on these stamps.
Attributes of Paper Other Than Fluorescence
The paper used to print these stamps is always very white, even when viewed against a stark white background like a stock card. However, apart from the paper fluorescence, there are some other differences in the paper used to print these stamps that are not mentioned in any of the catalogues. In my study of the examples I have on hand, I have found the following types of paper:
Paper Fluorescence
Unitrade lists three levels of fluorescence on these stamps: fluorescent, dull fluorescent and low fluorescent. There is a lot of confusion that can arise when trying to sort the stamps for the first time, given that the fluorescent paper is the common one and is worth a lot less than the low and dull fluorescent papers. Another point of confusion is that both flecked and non-flecked versions of the papers exist. The final point of confusion is that the flecked versions of the low and dull fluorescent papers are not really that at all, but non-fluorescent paper that contains enough fluorescent fibres to make the paper appear dull fluorescent or low fluorescent overall.
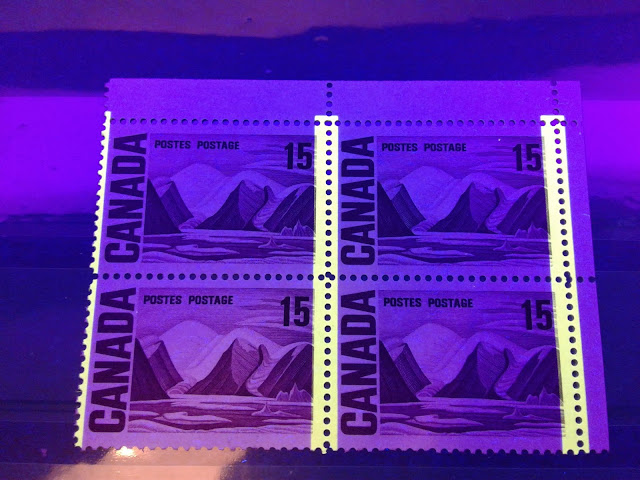
A good starting point is to become familiar with the appearance of the fluorescent paper. There are at least two types of the fluorescent paper, but when you know what to look for and you compare it to the other papers, the difference is outstanding. The picture below shows the difference between these types of paper:
In studying these stamps I have found three variations of the paper that I believe matches what Unitrade considers to be low fluorescent:

The first type of paper is shown in the top block, while the second type is shown on the lower block. if you compare the top and bottom selvage tabs on each block you can see that the top block is noticeably brighter than the bottom block.
The next picture shows the first and third types of paper:
The picture below shows the first two types:


Shades
In studying these stamps I have found two shades as shown in the scan below:
 The ink used to print this stamp are, on the whole much redder than those used on the stamps with dextrine gum. The stamp on the left is the reddest, and this can be seen most clearly in the shading on the mountains and water. On the Gibbons colour key, the stamp on the left is deep rose lilac, while the one on the right is blackish purple.
Under UV light, the ink used to print the stamps on fluorescent paper looks black, whereas the ink on the other printings still looks deep purple. So the inks used on these printings are both transformative, and non-transformative.
Gum

There are two types of PVA gum on these stamps, as shown in the picture above:
Perforation
On the stamps I have examined, I have found all four perforations: 11.95, 11.85 x 11.95, 11.95 x 11.85 and 11.85. This was surprising as the 11.95 machines should have been completely phased out by 1972. However, it is probable that they were printed in late 1971, and were issued in early 1972.
Winnipeg Tagging
The Winnipeg tagging was applied down the columns between the stamps, and like the other issues, was applied with less space between the columns of tagging bars on the two outer columns, as compared to the inside columns. Like other denominations of the issue, the tagging bars are 8.5 mm wide and were applied in the same manner to the panes in the print layout, so that the top panes received the tagging first, followed by the bottom ones.
As is the case with other Winnipeg tagging, the intensity of the tagging as it appears in normal light does show some variation, which reflects different concentrations of taggant that was applied to the stamps. The tagging varies from moderately strong, which is just visible as light yellow bands, to strong, in which the bands are very clearly visible as yellow bands.
The scan below shows the difference between the moderately strong tagging to strong tagging:

General Ottawa Tagging
The general Ottawa tagging consisted of 4 mm wide bands applied down the perforations 23 mm apart. The bands appear very light yellow in normal light, and deep bright greenish yellow under UV light as shown in the picture below:
The intensity of the tagging in normal light varies from moderate, which is just visible, as light yellow bands to deep, which is a deep yellow.
Putting it All Together
The untagged stamps were printed from plate 3 only. I have identified 8 paper types, two shades, two gum types, and four perforations. Thus there could be as many as 8 x 2 x 2 x 4 = 128 collectible stamps, 512 plate blocks and 1,536 blank corner blocks. If you factor in the plastic flow varieties, the number of collectible singles and blocks doubles.
For the Winnipeg tagged stamps, I have identified 4 papers, 2 shades, 2 gum types, and four perforations. Thus there could be as many as 4 x 2 x 2 x 4 = 64 collectible stamps and 768 blank corner blocks. The number is the same for the general tagged stamps. As is the case with the untagged stamps, the number of collectible varieties doubles.
This brings me to the end of the 15c value. We now have just four more values to complete the series, so I am getting to the end of a very long and fascinating road. Next week I will explore the printings of the 20c Quebec Ferry.
Unitrade lists four varieties of the untagged stamps, three of which are very scarce, and does not list any plastic flow varieties, even though they clearly do exist on the untagged PVA gum printings, as well as on the dextrine gum printings. I have started to use the term dextrine rather than dextrose after David Gronbeck-Jones, the famous Centennial issue specialist and author pointed out to me that dextrose is the sugar from which the dextrine gum is made. The tagged stamps are listed by Unitrade as existing with both Winnipeg tagging and General Ottawa tagging, on both dull and low fluorescent papers, for a total of 4 basic varieties. All of these exist, of course with plastic flow varieties.
According to Unitrade, the general tagged stamps were the first to appear, in February 1972, followed by the Winnipeg tagged stamps in March. All of the untagged stamps are given as being issued in 1972, but no exact date has been given for their issuance. In the absence of compelling evidence to the contrary, I would assume that they should have been issued at the same time as the tagged stamps on comparable paper.
The remainder of this post will examine the differences in paper, shade, perforation and gum that can be found on these stamps.
Attributes of Paper Other Than Fluorescence
The paper used to print these stamps is always very white, even when viewed against a stark white background like a stock card. However, apart from the paper fluorescence, there are some other differences in the paper used to print these stamps that are not mentioned in any of the catalogues. In my study of the examples I have on hand, I have found the following types of paper:
- A vertical wove paper that shows no ribbing, either on the front or the back, and which shows no mesh pattern when the stamps printed on it are held up to strong back lighting. There is a light surface coating on the paper that is visible without a magnifier, as a highly burnished printing surface.
- A horizontal wove paper that also shows no ribbing. However when held up to a strong light, a series of closely spaced horizontal striations can be seen.
- A horizontal wove paper that also shows no ribbing. Unlike the second type above, this paper shows no mesh pattern when held up to a strong back light.
- A vertical wove paper that has very clear vertical ribbing on the face. There is a very light surface coating that prevents any stray fibres on the paper surface. When held up to strong back lighting, a very strong vertical mesh pattern is visible.
From what I can see first type of paper seems to exist with low levels of fluorescence. The second type seems to be confined to the fluorescent papers. The third type also is found with low fluorescence and dull fluorescence. The fourth type seems to exist only with dull fluorescence.
Paper Fluorescence
Unitrade lists three levels of fluorescence on these stamps: fluorescent, dull fluorescent and low fluorescent. There is a lot of confusion that can arise when trying to sort the stamps for the first time, given that the fluorescent paper is the common one and is worth a lot less than the low and dull fluorescent papers. Another point of confusion is that both flecked and non-flecked versions of the papers exist. The final point of confusion is that the flecked versions of the low and dull fluorescent papers are not really that at all, but non-fluorescent paper that contains enough fluorescent fibres to make the paper appear dull fluorescent or low fluorescent overall.
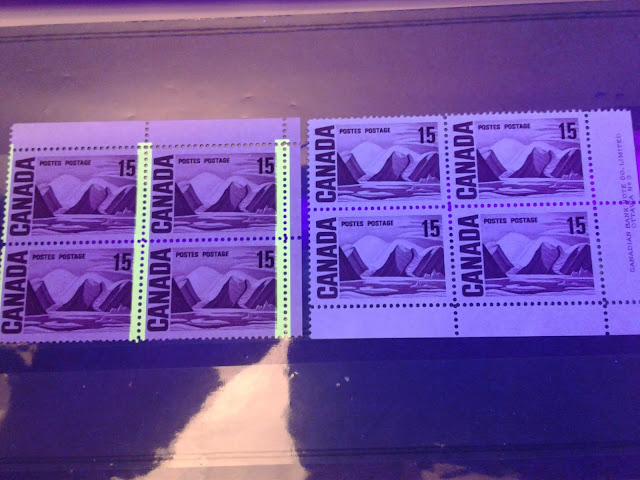
A good starting point is to become familiar with the appearance of the fluorescent paper. There are at least two types of the fluorescent paper, but when you know what to look for and you compare it to the other papers, the difference is outstanding. The picture below shows the difference between these types of paper:

The so called low fluorescent paper is shown on the left block, while the fluorescent paper is shown by the block on the right. The difference is unmistakable. The fluorescent paper, as you can see has a bluish white colour that at first appears to be uniform. Upon close examination with a loupe, one can generally see that this paper is actually a flecked paper in which the florescent fibres are overshadowed by the inherent fluorescence of the paper. In contrast the dull fluorescent papers or low fluorescent papers appear shades of dark blue or violet under the UV light. This paper shouldn't exist tagged, but of course anything is possible with this issue. Once you have seen this difference though, it should be reasonably easy to pick out those on fluorescent paper. Then you can focus on differentiating the different varieties of fluorescent paper and then sorting the dull from low fluorescent paper.
Dull Fluorescent Papers
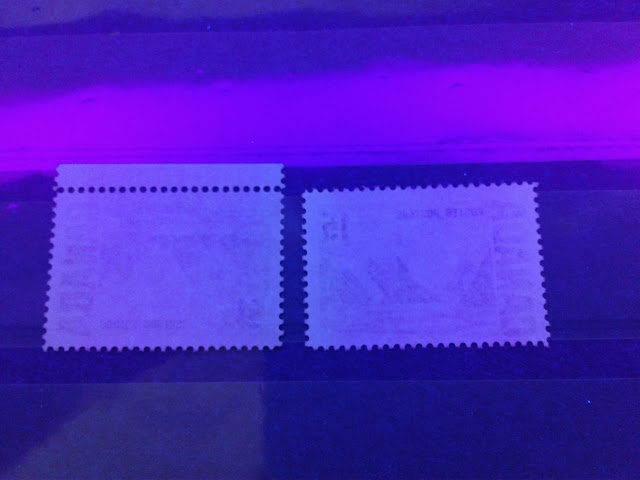
I have found only one type of the dull fluorescent paper. It is dull fluorescent violet grey paper that contains no fluorescent fibres. The picture below shows an example of this paper:

The paper described here is shown on the right. The stamp on the left is one of the low fluorescent papers, that contains the low fluorescent fibres.
Low Fluorescent Papers
In studying these stamps I have found three variations of the paper that I believe matches what Unitrade considers to be low fluorescent:
- A dull fluorescent violet grey paper under UV. The paper contains a low density concentration of low fluorescent fibres, a sparse concentration of medium fluorescent fibres and a very sparse concentration of high fluorescent fibres, which together make it appear low fluorescent.
- A dull fluorescent grey paper under UV. The paper contains a low density concentration of low fluorescent fibres, and very sparse concentrations of medium and high fluorescent fibres.
- A dull fluorescent grey-blue paper under UV. This paper contains sparse concentrations of low, medium and high fluorescent fibres, as well as very few hibrite fibres.
The pictures below show these paper types:
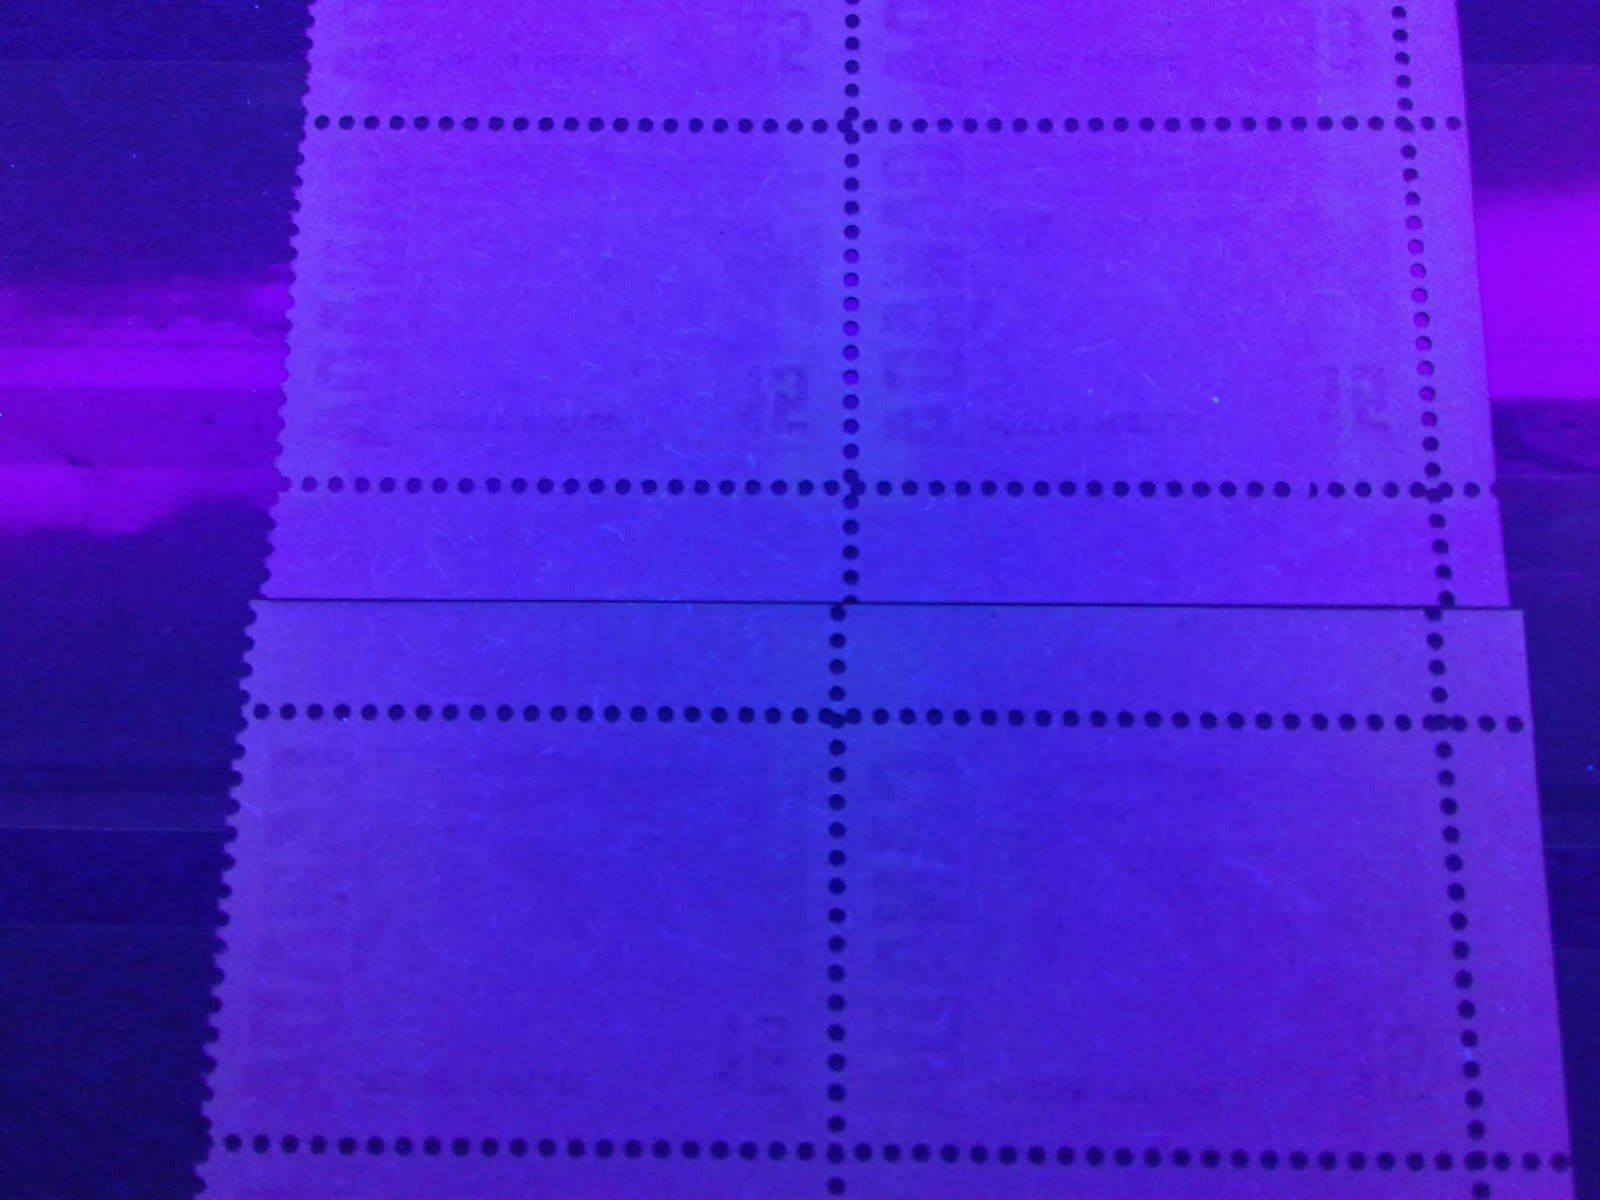
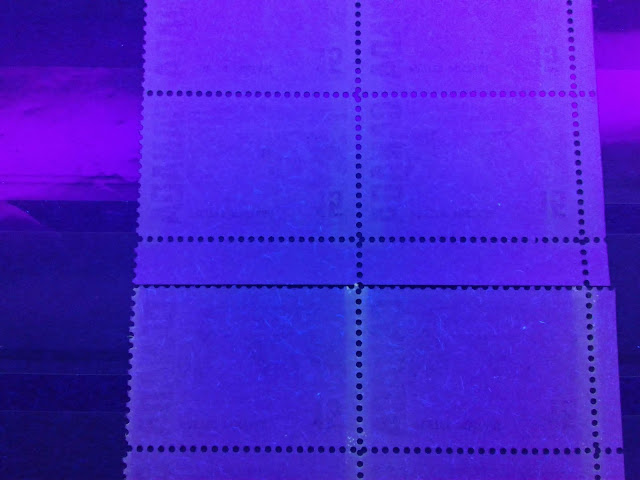
The first type of paper is shown in the top block, while the second type is shown on the lower block. if you compare the top and bottom selvage tabs on each block you can see that the top block is noticeably brighter than the bottom block.
The next picture shows the first and third types of paper:

These are of similar brightness, but as you can see there are more fluorescent fibres in the bottom block, compared to the top block.
Fluorescent Papers
The fluorescent papers are very similar, but I have identified three types of paper:
- Dull fluorescent light blue paper that contains a low density concentration of low fluorescent fibres, a sparse concentration of medium fluorescent fibres and very few high fluorescent fibres. There are also very few brownish woodpulp fibres in the paper.
- Dull fluorescent bluish white paper that contains a low density concentration of low fluorescent fibres, a very sparse concentration of medium fluorescent fibres and very few brownish woodpulp fibres.
- Low fluorescent bluish white paper that contains a low density concentration of low fluorescent fibres, a very sparse concentration of medium fluorescent fibres and very few high fluorescent fibres.
The picture below shows the first two types:
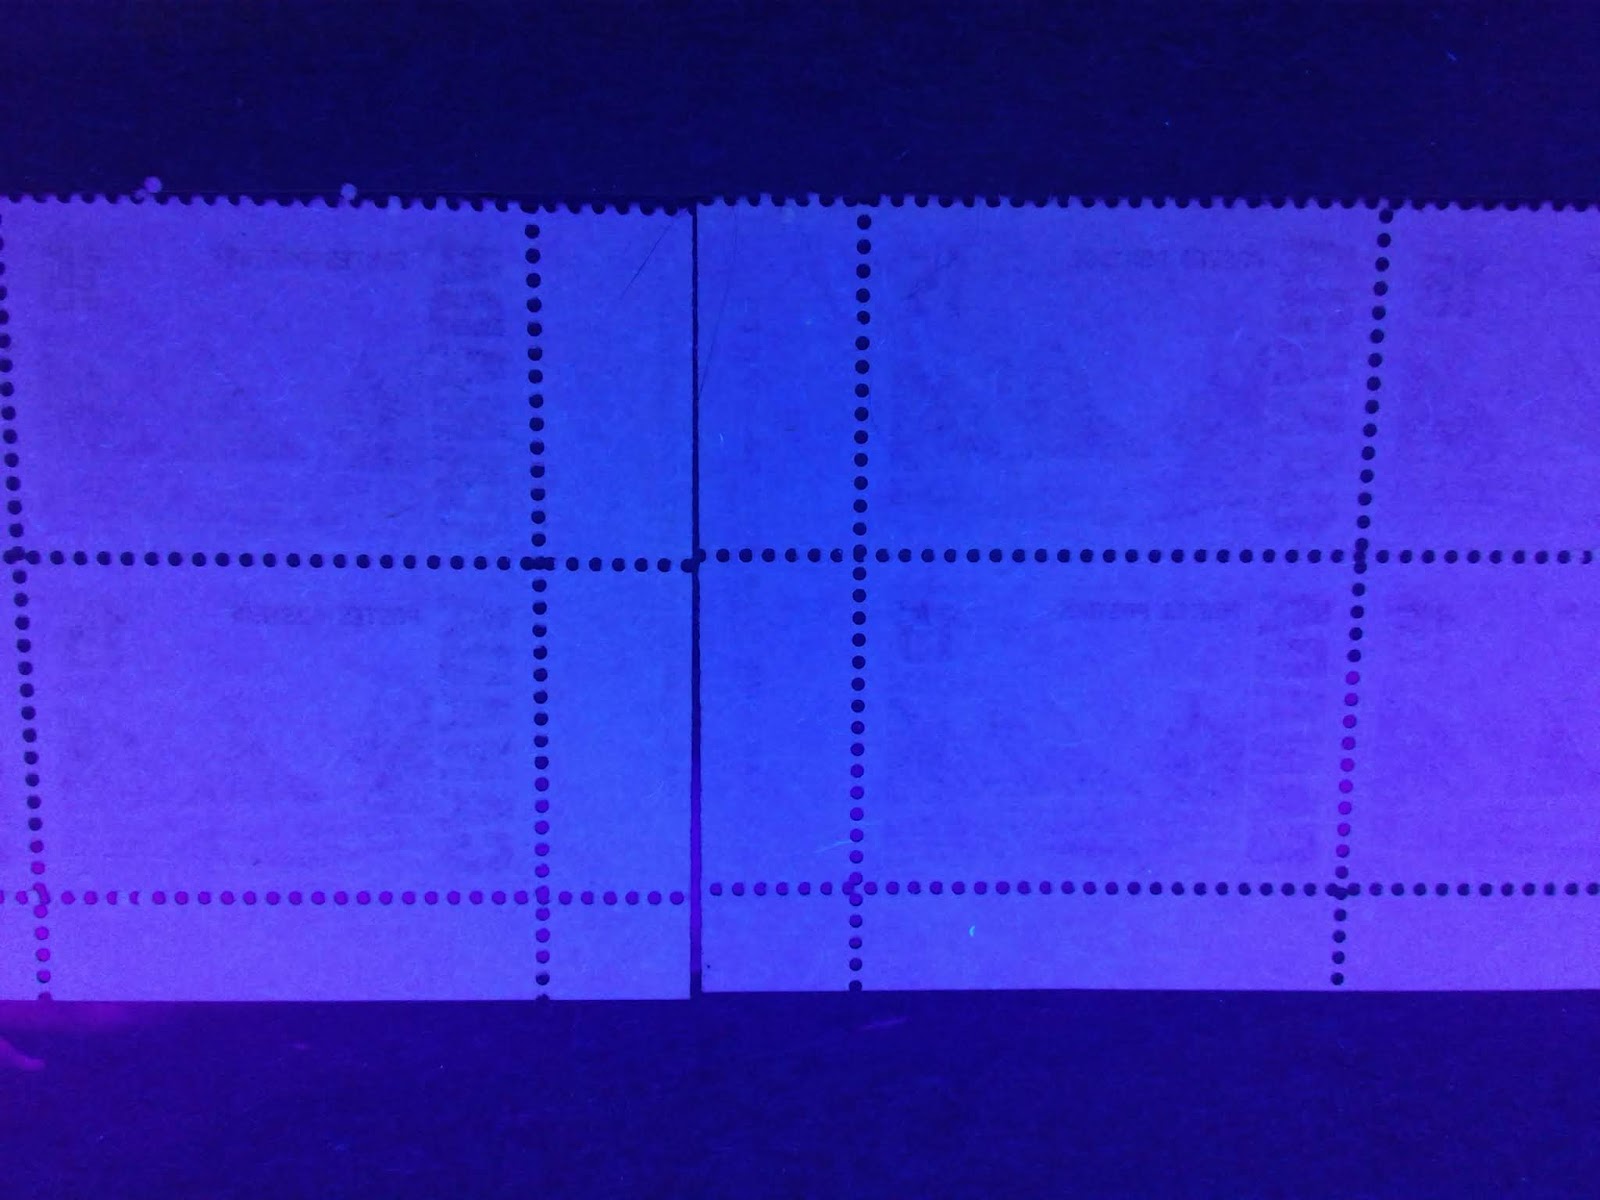
As you can see, the two types look very, similar overall. The only difference really is the colour under UV, with the right block being bluer than the block on the left.
The picture below shows the first and third types:

Here you should be able to see that the block on the right is clearly brighter than the block on the left.
Shades
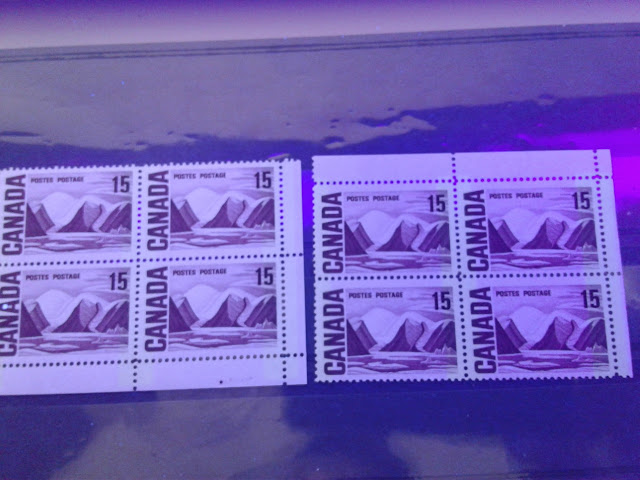
In studying these stamps I have found two shades as shown in the scan below:

Under UV light, the ink used to print the stamps on fluorescent paper looks black, whereas the ink on the other printings still looks deep purple. So the inks used on these printings are both transformative, and non-transformative.
Gum

There are two types of PVA gum on these stamps, as shown in the picture above:
- A white gum with a satin sheen, as shown on the block above.
- A dull, white gum with an eggshell sheen, as shown on the bottom block.
Generally, I have found that the plate 3 printings on the fluorescent paper exist only with the first type of gum, while the tagged stamps exist with the second type of gum.
Perforation
On the stamps I have examined, I have found all four perforations: 11.95, 11.85 x 11.95, 11.95 x 11.85 and 11.85. This was surprising as the 11.95 machines should have been completely phased out by 1972. However, it is probable that they were printed in late 1971, and were issued in early 1972.
Winnipeg Tagging
The Winnipeg tagging was applied down the columns between the stamps, and like the other issues, was applied with less space between the columns of tagging bars on the two outer columns, as compared to the inside columns. Like other denominations of the issue, the tagging bars are 8.5 mm wide and were applied in the same manner to the panes in the print layout, so that the top panes received the tagging first, followed by the bottom ones.
As is the case with other Winnipeg tagging, the intensity of the tagging as it appears in normal light does show some variation, which reflects different concentrations of taggant that was applied to the stamps. The tagging varies from moderately strong, which is just visible as light yellow bands, to strong, in which the bands are very clearly visible as yellow bands.
The scan below shows the difference between the moderately strong tagging to strong tagging:

The block on the left is the moderately strong tagging, while the block on the right is the strong tagging.
Under UV, the tagging shows up as light yellowish white bands as shown below:

According to Rose, the PVA gum printing exists with W2aL tagging error in which a single wide tagging bar appears at the left side.
The general Ottawa tagging consisted of 4 mm wide bands applied down the perforations 23 mm apart. The bands appear very light yellow in normal light, and deep bright greenish yellow under UV light as shown in the picture below:

The intensity of the tagging in normal light varies from moderate, which is just visible, as light yellow bands to deep, which is a deep yellow.
Putting it All Together
The untagged stamps were printed from plate 3 only. I have identified 8 paper types, two shades, two gum types, and four perforations. Thus there could be as many as 8 x 2 x 2 x 4 = 128 collectible stamps, 512 plate blocks and 1,536 blank corner blocks. If you factor in the plastic flow varieties, the number of collectible singles and blocks doubles.
For the Winnipeg tagged stamps, I have identified 4 papers, 2 shades, 2 gum types, and four perforations. Thus there could be as many as 4 x 2 x 2 x 4 = 64 collectible stamps and 768 blank corner blocks. The number is the same for the general tagged stamps. As is the case with the untagged stamps, the number of collectible varieties doubles.
This brings me to the end of the 15c value. We now have just four more values to complete the series, so I am getting to the end of a very long and fascinating road. Next week I will explore the printings of the 20c Quebec Ferry.